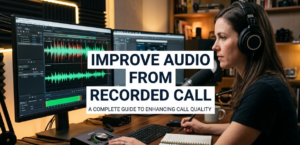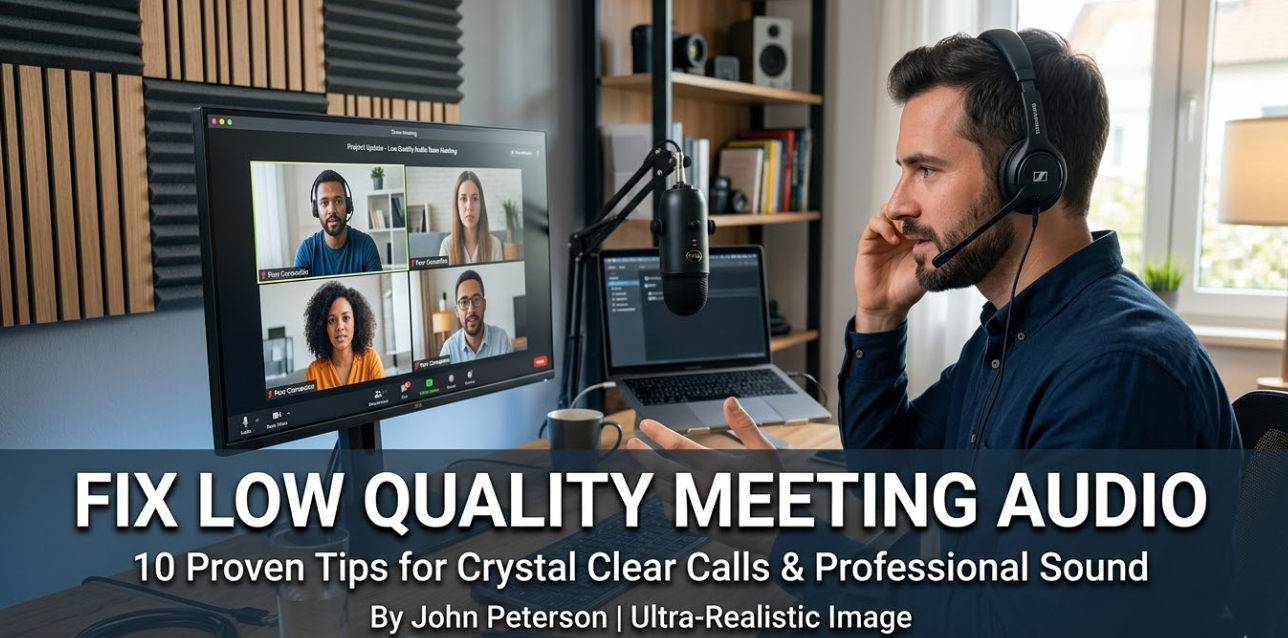
Poor audio ruins meetings. Even a well-prepared presentation falls flat when people are saying “Can you repeat that?” every few minutes. If you want to fix low quality meeting audio, you’re not alone — it’s one of the most common complaints in the remote work era.
Bad meeting audio costs more than just time. It drains focus, kills engagement, and makes you look unprofessional. The good news? Most audio problems are fixable. And you don’t need to be a sound engineer to fix them.
This guide covers everything — from why audio breaks down to the exact tools, settings, and habits that make your meetings sound crisp, clean, and professional.
Why Your Meeting Audio Sounds So Bad
Before you can fix low quality meeting audio, you need to understand what’s causing it. Most bad audio comes from a mix of hardware problems, software settings, and environment issues.
The Most Common Culprits
Here are the main reasons meeting audio sounds terrible:
Poor microphone quality — Built-in laptop mics pick up everything: keystrokes, fan noise, the hum of your AC. They’re designed to be “good enough,” not professional.
Bad room acoustics — Hard floors, bare walls, and open spaces bounce sound around. This creates echo and reverb that makes voices sound hollow or robotic.
Internet connection problems — Packet loss and lag cause the choppy, robotic audio that makes people sound like they’re talking from underwater.
Wrong software settings — Many people never check their audio settings in Zoom, Teams, or Google Meet. Default settings often aren’t optimized for your setup.
Background noise — Fans, HVAC systems, barking dogs, traffic, and keyboard clicks all get picked up by sensitive microphones.
Upgrade Your Microphone First
The single biggest improvement you can make is upgrading your microphone. Your laptop’s built-in mic is a major reason you need to fix low quality meeting audio in the first place.
Types of Microphones for Meetings
USB Condenser Microphones — These plug directly into your computer. No audio interface needed. They’re sensitive, clear, and great for quiet rooms. Popular options include the Blue Yeti, Rode NT-USB, and Samson Q2U.
Dynamic Microphones — Less sensitive than condenser mics. That actually makes them better in noisy environments since they don’t pick up as much background sound.
Headset Microphones — A solid headset keeps the mic at a consistent distance from your mouth. This is often the easiest upgrade. Look for headsets made for communication, not just music listening.
Lavalier (Lapel) Microphones — These clip to your shirt and stay close to your mouth. They’re great if you move around during calls. Just watch out for clothing rustle.
Microphone Comparison Table
| Microphone Type | Best For | Price Range | Background Noise | Setup Difficulty |
|---|---|---|---|---|
| Built-in Laptop Mic | Nothing (avoid) | Free | Very High Pickup | None |
| USB Condenser | Quiet home offices | $50–$200 | Medium Pickup | Easy |
| Dynamic USB | Noisy environments | $60–$150 | Low Pickup | Easy |
| Headset Mic | Moving around | $30–$150 | Medium Pickup | Easy |
| Lavalier Mic | Standing presentations | $20–$100 | Low Pickup | Easy |
Microphone Placement Matters
Even a great mic won’t help if it’s in the wrong place. Keep it 6 to 12 inches from your mouth. Point it slightly off-axis — meaning not directly at your mouth — to reduce plosives (those harsh “p” and “b” sounds). Never place it behind your laptop screen.
Fix Your Room Before You Fix Your Tech
Many people skip this step. It’s a mistake. Room acoustics can make even a $200 microphone sound like a $10 one.
How Echo and Reverb Kill Call Quality
Sound bounces off hard surfaces. When it bounces back to your microphone, listeners hear a slight delay — that’s echo. When many reflections happen at different times, it sounds hollow or like you’re in a tunnel.
Easy Room Fixes That Actually Work
Add soft materials to your space. Bookshelves filled with books, thick curtains, carpet, and upholstered furniture all absorb sound. They stop it from bouncing around.
Record in smaller spaces. A small closet with clothes hanging in it is one of the best improvised recording booths you’ll find. The clothing absorbs sound naturally.
Hang a moving blanket or acoustic foam. You don’t need a professional studio setup. A moving blanket behind you or on the wall behind your screen makes a noticeable difference.
Use rugs and soft furnishings. Hard floors are echo machines. A rug under your desk helps more than people expect.
Close doors and windows. This blocks outside noise from entering and reduces sound from bouncing out of the room and back in.
Sort Out Your Internet Connection
Choppy, robotic, or cutting-out audio is almost always a network problem. No microphone upgrade fixes packet loss.
Quick Internet Fixes for Clearer Meeting Audio
Use a wired ethernet connection. Wi-Fi is convenient but inconsistent. A direct ethernet cable gives you lower latency and more stable speeds.
Move closer to your router. If you’re on Wi-Fi, distance and walls reduce signal strength. Closer means more stable.
Disconnect unused devices. Every device on your network uses bandwidth. Streaming, gaming, and large downloads during calls cause audio problems.
Upgrade your plan if needed. Most video calls need at least 3 Mbps upload and download. If you’re sharing that with a household, you may need more.
Use a 5GHz Wi-Fi band instead of 2.4GHz. The 5GHz band is faster and less congested, though it has shorter range.
Network Speed Minimums for Clear Meeting Audio
| Meeting Type | Minimum Download | Minimum Upload | Recommended |
|---|---|---|---|
| Audio only | 100 Kbps | 100 Kbps | 500 Kbps |
| Video (360p) | 600 Kbps | 600 Kbps | 1 Mbps |
| Video (720p HD) | 1.5 Mbps | 1.5 Mbps | 3 Mbps |
| Video (1080p Full HD) | 3 Mbps | 3 Mbps | 5 Mbps |
| Large group calls (10+) | 4 Mbps | 2 Mbps | 8 Mbps |
Adjust Your Software Audio Settings
Hardware is only half the equation. Your platform settings play a huge role in whether you sound clear or muffled.
Zoom Audio Settings to Fix Low Quality Meeting Audio
Open Zoom, go to Settings → Audio. Here’s what to adjust:
- Suppress background noise — Set to “Medium” or “High” depending on your environment. High suppression is aggressive and can sometimes make voices sound unnatural.
- Enable original sound — Only turn this on if you use a professional external mic. Otherwise, leave it off.
- Echo cancellation — Leave this on always.
- Automatically adjust microphone volume — Turn this off if you’re using a dedicated microphone with manual gain control. It can sometimes over-correct and cause volume jumps.
- Stereo audio — Turn off for meetings. Stereo audio sounds great for music but uses more bandwidth and can cause issues in calls.
Microsoft Teams Audio Settings
In Teams, go to Settings → Devices. Select your external microphone if you have one. Teams also has noise suppression built in — go to Settings → Devices → Noise suppression and set it to “High.”
Teams uses an AI-powered noise reduction system. It works well for constant background sounds like fans. It’s less effective with unpredictable sounds like someone talking in the background.
Google Meet Audio Settings
In Google Meet, click the three dots → Settings → Audio. Choose your correct microphone from the dropdown. Google Meet has limited in-app noise suppression compared to Zoom and Teams, so you may need to rely more on external solutions.
Use Noise Cancellation Software
Even with a good mic and a treated room, background noise sneaks through. Noise cancellation software acts as a real-time filter between your microphone and the meeting platform.
Top Noise Cancellation Tools
Krisp — One of the most popular options. Works as a virtual audio device. It removes background noise and echo before your audio reaches the meeting app. Works with any platform.
NVIDIA RTX Voice — If you have an NVIDIA RTX graphics card, this is free and very powerful. It uses AI processing on the GPU to remove noise in real-time.
SpeechFocus by Anthropic — No, not really. But tools like Cleanfeed and RTX Voice are real options.
NVIDIA Broadcast — The expanded version of RTX Voice. Adds virtual background and camera effects alongside noise removal.
Zoom’s built-in AI denoising — Zoom has improved this significantly. For most users, the built-in tools work well without adding extra software.
For those who record meetings or create audio content alongside calls, tools like the ones available at VocalRemoverX can help clean up recorded audio after the fact — removing background noise, isolating voices, and improving overall quality before sharing or archiving.
How Noise Cancellation Software Works
These tools analyze your audio stream in real-time. They separate speech from non-speech sounds using machine learning models trained on thousands of hours of audio. The result is that keyboard clicks, fans, air conditioners, and barking dogs get filtered out before anyone else hears them.
Headphones Matter More Than You Think
Using speakers during a call is one of the fastest ways to create echo and feedback. The sound from your speakers bleeds back into your microphone. Your platform then picks it up and sends it back out — creating that annoying echo effect others hear.
The Fix: Use Headphones
Headphones keep the audio output away from your microphone. This alone eliminates most echo issues.
Wired headphones — Most reliable. No battery issues, no lag, no connectivity drops.
Wireless headphones with a dedicated dongle — More reliable than Bluetooth for calls. Bluetooth can sometimes add latency.
Bluetooth headphones — Convenient. Just make sure they support hands-free audio profiles (HFP or HSP) and not just stereo music profiles (A2DP). Music-only profiles reduce mic quality significantly.
In-ear monitors (IEMs) — Small, portable, and very effective at isolating sound. A good pair of wired IEMs with an inline microphone works surprisingly well for meetings.
Advanced Fixes for Persistent Audio Problems
If you’ve tried the basics and still can’t fix low quality meeting audio, these advanced steps go deeper.
Use an Audio Interface
An audio interface connects professional XLR microphones to your computer. It gives you precise control over gain (volume), and the preamps inside interfaces are far better quality than what’s built into laptops.
Popular interfaces for home office use: Focusrite Scarlett Solo, PreSonus AudioBox USB 96, Universal Audio Volt 1.
You don’t need this unless you’re using a professional XLR mic. But if you’re doing regular client presentations, webinars, or podcasts, it’s worth the investment.
Check Your Sample Rate and Bit Depth
In your system’s audio settings:
- Sample rate: 44,100 Hz (44.1 kHz) is standard. 48,000 Hz is also common for video. Make sure your microphone, audio interface, and software all match. Mismatched sample rates cause distortion and artifacts.
- Bit depth: 16-bit is standard for communication. 24-bit is for recording. Don’t go above 16-bit for meetings — it uses more bandwidth with no real benefit in call quality.
Disable Audio Enhancements in Windows
Windows has built-in audio enhancements that often do more harm than good. Go to:
Control Panel → Sound → Recording → Right-click your mic → Properties → Enhancements
Turn off all enhancements. These include bass boost, noise suppression, and room correction. Professional audio software handles this better.
Update Your Audio Drivers
Outdated audio drivers cause all kinds of weird problems — crackling, cutting out, volume jumps. Check your manufacturer’s website for the latest drivers. For USB microphones, visit the manufacturer’s support page directly.
Test Your Audio Before Every Meeting
This one habit can prevent most audio problems. Test your setup before you join the call — not while everyone is waiting for you.
How to Do a Proper Audio Test
Use your platform’s test feature. Zoom, Teams, and Google Meet all have a “Test Microphone” button in settings. Use it.
Record a short clip. Use your phone or a free tool like Audacity. Listen back. You’ll immediately hear echo, background noise, or muffled audio you didn’t notice while speaking.
Ask for feedback. Join an early and ask someone to confirm your audio is clear. Most people won’t volunteer this information — you have to ask directly.
Check your output (headphones/speakers) too. If you can’t hear others clearly, the problem might be on their end. Or it might be your output settings.
Build a Meeting Audio Checklist
Consistency is key. Use this checklist before every important meeting.
Pre-Meeting Audio Checklist
| Check Item | What to Verify |
|---|---|
| Microphone selected | Correct mic chosen in platform settings |
| Headphones plugged in | Not using laptop speakers |
| Background noise | Room is quiet, door is closed |
| Internet connection | Ethernet connected or strong Wi-Fi signal |
| Noise cancellation on | Krisp or platform noise suppression active |
| Audio test done | Test recording sounds clean |
| Volume levels | Mic gain not too high (causes distortion) or too low |
| Notifications muted | System sounds turned off |
What to Do During a Live Call When Audio Goes Wrong
Sometimes things break mid-meeting. Here’s how to handle it quickly.
Quick Fixes During a Live Call
Mute yourself when not speaking. This is the most underrated audio fix. Background noise from your end stops immediately.
Drop and rejoin. If audio suddenly becomes bad, leave the call and rejoin. This resets your audio connection and often fixes choppy audio caused by packet loss.
Switch to phone audio. Most platforms let you call in via phone while staying on the computer video. Phone audio often sounds cleaner than computer audio on unstable connections.
Turn off video. If your internet is struggling, turning off your camera frees up bandwidth for audio. Audio quality comes first.
Reduce your video resolution. In settings, reduce video quality to 360p or 480p. This frees up bandwidth immediately.
How Room Treatment Actually Works
This section goes a little deeper into acoustics for those dealing with serious echo or reverb problems.
Sound Reflection vs. Sound Absorption
When sound hits a hard surface like a wall or window, most of it bounces back. Soft surfaces — foam, fabric, carpet — absorb the sound wave instead of reflecting it.
Acoustic panels are dense foam or fabric-covered frames. They absorb mid and high frequencies very effectively. Place them at “reflection points” — the spots on your walls where sound from your mouth reflects toward your microphone.
Bass traps absorb low-frequency rumble. If you have a room that sounds very boomy or deep, bass traps in corners help significantly.
Diffusers scatter sound rather than absorbing it. They make a room sound livelier without creating harsh reflections.
For most meeting situations, you don’t need all of this. A few acoustic panels behind your screen and on the wall behind you makes an audible difference.
According to Sweetwater’s acoustic treatment guide, even basic room treatment can reduce reverb time by 50% or more — a dramatic improvement in perceived audio quality.
Frequently Asked Questions About Fixing Meeting Audio
Q: Why does my voice sound robotic or choppy in meetings?
Robotic or choppy audio is almost always caused by internet connection problems — specifically packet loss or high latency. Try switching to a wired ethernet connection, closing unused apps and browser tabs, and asking others in your household to pause streaming or downloads during your call.
Q: Do I really need an external microphone, or will the built-in one work?
Built-in laptop microphones work for casual calls. For professional meetings, client presentations, or any situation where audio quality matters, an external microphone makes a significant difference. Even a $50 USB microphone is a major upgrade.
Q: How do I stop my voice from echoing on calls?
Echo comes from your speakers leaking sound back into your microphone. Use headphones — this eliminates the problem almost instantly. If you must use speakers, lower their volume and increase the distance between speakers and microphone.
Q: Why does my microphone pick up so much background noise?
Most microphones are omnidirectional — they pick up sound from all directions. Upgrade to a cardioid microphone (which only picks up sound from in front of it) and use noise cancellation software like Krisp or NVIDIA RTX Voice.
Q: Can software really fix bad microphone quality?
Software can clean up audio and remove background noise effectively. Tools like Krisp are genuinely impressive. However, software cannot add frequency range your microphone doesn’t capture. If your mic sounds muffled, no software fully fixes that — you need a better microphone.
Q: What’s the fastest single fix for bad meeting audio?
Plug in headphones. This one change removes echo, improves your ability to hear others, and immediately improves the listening experience for everyone on your call.
Q: Is Bluetooth audio good enough for meetings?
Yes, with caveats. Make sure your Bluetooth headset supports the HFP (Hands-Free Profile) or HSP (Headset Profile) audio codec — not just A2DP. A2DP is for music listening and doesn’t support the microphone properly, resulting in very low quality audio during calls.
Q: How do I know if my audio sounds good to others?
Record a short test clip and listen back. Use your platform’s audio test feature. Ask a trusted colleague to give honest feedback before an important meeting.
Your Audio Quality Directly Reflects Your Professionalism
Here’s the thing people don’t always say out loud: bad audio affects how people perceive you. Studies in communication show that poor audio quality leads listeners to unconsciously rate speakers as less credible, less intelligent, and less competent.
That’s not fair. But it’s real.
When you fix low quality meeting audio, you’re not just improving sound. You’re removing friction from every conversation. You’re making it easier for people to hear your ideas. You’re telling everyone on the call that you take this seriously.
The changes in this guide range from free (closing a door, using headphones, adjusting settings) to modest investments (a decent microphone, acoustic panels). Start with the free ones today. Add the paid upgrades as your needs grow.
Clear audio is achievable for everyone. You just have to make it a priority.
Quick-Start Action Plan to Fix Low Quality Meeting Audio
Use this priority order to get the biggest improvements fastest:
- Plug in headphones — free, immediate, eliminates echo
- Close background apps and use ethernet — free, fixes choppy audio
- Adjust your platform’s noise suppression settings — free, reduces background noise
- Install Krisp (free tier) — removes persistent background noise
- Upgrade to a USB cardioid microphone — biggest audio quality jump
- Add soft materials to your room — fixes echo and reverb
- Consider an acoustic panel behind your screen — professional-level improvement
Start at the top and work your way down. Most people notice dramatic improvements after just the first two or three steps.
Your meetings deserve better audio — and so does everyone listening to you.