If you’ve ever sat through an amazing webinar and thought, “I wish I could just listen to this on my commute” — you’re not alone.
Webinar recordings are packed with valuable content. But watching a full video isn’t always practical. That’s where learning how to extract voice from webinar recordings becomes a game-changer.
Whether you’re a content creator, a student, a business owner, or a podcast host, pulling the audio from a recorded webinar opens up a whole new world of possibilities. You can repurpose that content, transcribe it, share it as a podcast episode, or simply save it for offline listening.
In this guide, you’ll learn exactly how to do it — step by step, with free and paid options, across all major platforms.
What “Extracting Voice” From a Webinar Actually Means
Let’s clear something up first.
When people say they want to extract voice from webinar recordings, they usually mean one of two things:
- Separating the audio track from the video file — so they get just the voice without the video
- Isolating only the spoken voice — removing background music, noise, or other sounds from the recording
Both are totally possible. And this guide covers both.
The result is typically an MP3 or WAV audio file that contains just the speaker’s voice, ready to use however you like.
Quick Comparison: Best Tools to Extract Voice From Webinar Recordings
Before we go deep, here’s a quick overview of your best options.
Method 1: Use VLC Media Player to Extract Voice From Webinar Recordings (Free & Fast)
VLC is one of the most underrated tools out there. Most people just use it to play videos. But it can also rip audio directly from any video file.
Step-by-Step With VLC
- Open VLC on your computer (Windows or Mac)
- Click Media in the top menu, then select Convert/Save
- Click Add and choose your webinar recording file
- Click the Convert/Save button at the bottom
- Under the Profile dropdown, select Audio – MP3 (or WAV if you need higher quality)
- Choose a destination folder where the audio file will be saved
- Click Start
VLC will process the file and save a clean audio track. It won’t isolate just the voice — it extracts the full audio layer. But if the webinar doesn’t have background music, this gives you the speaker’s voice loud and clear.
Best for: Quick audio extraction with no editing needed.
Method 2: Use Audacity for Free Voice Extraction and Noise Removal
Audacity is a free, open-source audio editor that’s been around for decades. It’s surprisingly powerful and is one of the top choices to extract voice from webinar recordings without spending a cent.
How to Extract Audio in Audacity
- Download and open Audacity (audacityteam.org)
- Go to File → Import → Audio and load your webinar file
- If you have a video file (MP4), you’ll need the FFmpeg library installed (Audacity will prompt you to download it)
- The audio waveform will appear on your screen
- Go to File → Export → Export as MP3 (or WAV)
- Choose your settings and click Save
How to Remove Background Noise in Audacity
This is where Audacity really shines for voice extraction.
- Find a section of your audio that has only background noise (no speaking)
- Select that section by clicking and dragging
- Go to Effect → Noise Reduction
- Click Get Noise Profile
- Now select the entire audio track (Ctrl+A or Cmd+A)
- Go to Effect → Noise Reduction again
- Click OK
The background noise gets filtered out, leaving just the voice. It’s not perfect, but it works really well for most webinar recordings.
Method 3: Extract Voice Using FFmpeg (Best for Batch Processing)
FFmpeg is a command-line tool. It’s not as beginner-friendly, but it’s incredibly fast and works on any operating system.
The Simple FFmpeg Command
Open your terminal or command prompt and type:
ffmpeg -i your-webinar.mp4 -vn -acodec libmp3lame output-audio.mp3Here’s what each part means:
-i your-webinar.mp4— input file-vn— removes the video-acodec libmp3lame— converts audio to MP3output-audio.mp3— the name of your output file
You can also extract WAV format by changing the command slightly:
ffmpeg -i your-webinar.mp4 -vn output-audio.wavBest for: Developers, IT teams, or anyone who needs to process many webinar recordings at once.
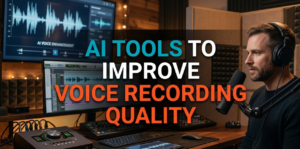
Method 4: AI-Powered Voice Isolation Tools (Best Results for Noisy Recordings)
If the webinar has background music, audience noise, or poor audio quality, you need more than basic extraction. You need AI voice isolation.
These tools use machine learning to separate the speaker’s voice from everything else.
Top AI Tools for Voice Separation
Adobe Podcast Enhance Speech
Adobe offers a free tool called Enhance Speech. You upload your audio file, and the AI removes background noise automatically. It’s mind-blowingly effective. The output is a clean, studio-quality voice track.
Steps:
- Go to podcast.adobe.com/enhance
- Upload your audio or video file
- Wait for the AI to process it
- Download the enhanced voice-only track
lalal.ai
This platform specializes in separating audio stems. It can isolate vocals from background music, which is useful if a webinar had intro music or background sound effects.
Steps:
- Visit lalal.ai
- Upload your file
- Choose Vocal as the stem to extract
- Download the isolated voice track
Best for: Webinars recorded in noisy environments or with background music.
Method 5: Use Descript for Audio Extraction + Automatic Transcription
Descript is a newer platform that combines audio editing with transcription. It’s perfect if you want to extract voice from a webinar and get a text transcript at the same time.
How Descript Works
- Create a free account at descript.com
- Upload your webinar recording (video or audio)
- Descript auto-transcribes the content
- Use the Studio Sound feature to clean up the audio
- Export just the audio track as MP3 or WAV
The bonus? You can edit the audio by editing the text transcript. Delete a sentence from the transcript, and Descript removes it from the audio too.
Best for: Content creators, podcasters, and educators who need both audio and transcript.
How to Extract Voice From Webinar Recordings on Specific Platforms
Different platforms store webinar recordings differently. Here’s a platform-by-platform breakdown.
V
visualize
V
How to Improve Voice Quality After Extraction
Extracting the audio is just the first step. Often, the raw audio needs some cleanup before it’s usable.
Common Audio Problems and Fixes
Problem: Background hiss or hum Fix: Use Audacity’s Noise Reduction tool (explained in Method 2 above)
Problem: Volume is too low Fix: In Audacity, go to Effect → Amplify and boost the volume
Problem: Echo or reverb Fix: Use a de-reverb plugin in Audacity or use Adobe Podcast Enhance
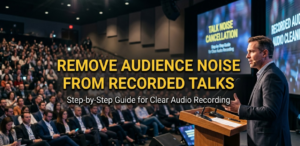
Problem: Multiple speakers are unclear Fix: Use tools like Krisp or NVIDIA RTX Voice to separate and enhance each speaker’s audio
Problem: Audio cuts off or has gaps Fix: Use Audacity’s Clip Fix tool under the Effect menu
The Step-by-Step Workflow for Perfect Voice Extraction
Here’s the complete workflow most professionals follow when they need to extract voice from webinar recordings for distribution or repurposing.
V
visualize
V
Ways to Repurpose Audio After You Extract Voice From Webinar Recordings
Once you have a clean audio file, the opportunities are endless. Here are the most popular ways people reuse webinar audio.
Turn It Into a Podcast Episode
Podcast consumption is booming. If you extract voice from a webinar recording and clean it up properly, it becomes a podcast episode with almost zero extra work. Upload it to platforms like Buzzsprout, Anchor, or Spotify for Podcasters.
Create a Transcription for SEO
Run your extracted audio through a transcription tool like Otter.ai, Rev.com, or Whisper by OpenAI. The resulting text can become a blog post, a web page, or a YouTube description — all of which help with search engine rankings.
For more insights on digital content strategies, check out Cryptonews21, which covers a range of topics on online media and content monetization.
Build an Audiogram for Social Media
An audiogram is a short video clip with an audio waveform animation and a caption. Tools like Headliner or Wavve let you create these in minutes. They’re perfect for Instagram, Twitter/X, and LinkedIn.
Create an Online Course Module
If the webinar was educational, the extracted voice can become a module in an online course. Pair it with slides using tools like Teachable or Thinkific.
Archive It as an Audio File
Sometimes the goal is simple: save the content for later listening. Extracting the audio means the file is smaller and easier to store than a full video.
Legal Things to Know Before You Extract Voice From Webinar Recordings
This is an important section. Many people skip it — don’t.
When You Can Extract Audio
- You created the webinar yourself
- You have written permission from the webinar host
- The content is licensed under Creative Commons
- You are extracting content from your own purchased course or event
When You Should Not Extract Audio
- The webinar is someone else’s copyrighted content
- The host has stated that recording or redistribution is not allowed
- You plan to re-sell or re-distribute the audio commercially without permission
Always read the terms of service of the webinar platform and any agreements you signed as an attendee. When in doubt, reach out to the content creator directly.
For more detailed guidance on digital media rights, the U.S. Copyright Office provides clear explanations of what’s protected and what’s considered fair use.
Audio File Formats Explained: Which One Should You Use?
When you extract voice from a webinar recording, you’ll be asked to choose a file format. Here’s a simple breakdown.
V
visualize
V
Quick rule: Use MP3 at 128kbps or higher for voice content. Use WAV if you plan to do more editing after extraction.
Tips to Get the Best Audio Quality When You Extract Voice From Webinar Recordings
Here are some pro tips that most guides skip over.
Record at the Source When Possible
If you’re organizing the webinar, always configure the recording settings first. Use the highest available audio quality. This makes extraction much cleaner.
Use Mono, Not Stereo, for Voice
Voice doesn’t need stereo audio. Mono cuts the file size in half and sounds just as good for speech. Most tools have a mono export option.
Normalize Volume Across the Recording
If speakers have different volume levels, use Audacity’s Normalize effect (Effect → Normalize) to bring everything to a consistent level.
Remove Long Silences
Webinars often have dead air — waiting for attendees, technical issues, etc. Use Audacity’s Truncate Silence tool to remove these automatically (Effect → Special → Truncate Silence).
Add ID3 Tags to Your MP3
If you’re distributing the audio as a podcast or archive, add metadata like the speaker name, title, date, and description. Audacity and most editing tools let you do this during export.
Frequently Asked Questions About Extracting Voice From Webinar Recordings
Can I extract voice from a webinar recording for free?
Yes, absolutely. Tools like VLC, Audacity, and FFmpeg are completely free. Adobe Podcast Enhance also offers free usage with some limitations. You don’t need to spend money to get great results.
What is the best format to save extracted webinar audio?
For general use, MP3 at 192kbps is the sweet spot between quality and file size. If you plan to edit the audio further, save it as WAV first, then convert to MP3 when you’re done.
How do I extract just one speaker’s voice from a webinar with multiple people?
This is tricky. Some AI tools like Krisp, Clearvoice, or Moises.ai can try to separate speakers. However, the most reliable method is to ask each speaker to send their own local recording, which many conferencing platforms support (called “local recording” in Zoom).
Is it legal to extract audio from a webinar I attended?
It depends on the terms of the event. If you paid for the webinar and downloaded the recording from the platform, you generally have the right to extract the audio for personal use. Re-distributing or selling it is a different matter and typically requires permission.
Can I extract voice from a live webinar recording saved to the cloud?
Yes. Cloud recordings from Zoom, Teams, and GoToWebinar are saved as MP4 files. Download the file first, then use any method in this guide to extract the audio.
What’s the difference between extracting audio and isolating voice?
Extracting audio means removing the video and keeping the full audio track (music, voice, background sounds). Isolating voice means using AI to keep only the spoken words and remove everything else.
Does extracting audio reduce quality?
If done correctly, no. Using lossless tools like FFmpeg or Audacity preserves the original audio quality. Only re-encoding (converting from MP3 to MP3, for example) causes quality loss.
Can I do this on a phone?
Yes. Apps like MP3 Video Converter (Android) or Media Converter (iOS) can extract audio from video files right on your phone. For AI enhancement, use mobile-friendly web tools like Adobe Podcast Enhance in your mobile browser.
The Bottom Line: Getting Voice Audio Out of Webinar Recordings Is Easier Than You Think
Whether you’re a teacher, a podcaster, a marketer, or just someone trying to listen to a presentation during your commute — knowing how to extract voice from webinar recordings is a genuinely useful skill.
You’ve got free tools like VLC and Audacity. You’ve got powerful AI tools like Adobe Podcast Enhance and lalal.ai. And you’ve got platform-specific workflows for Zoom, Teams, Google Meet, and more.
The key steps are simple:
- Get your webinar file
- Choose the right tool for your needs
- Extract and clean the audio
- Use or repurpose the file
Start with VLC or Audacity if you’re a beginner. Level up to AI tools when you need cleaner results. And always check the legal side before distributing anything.
Now go make that webinar content work harder for you