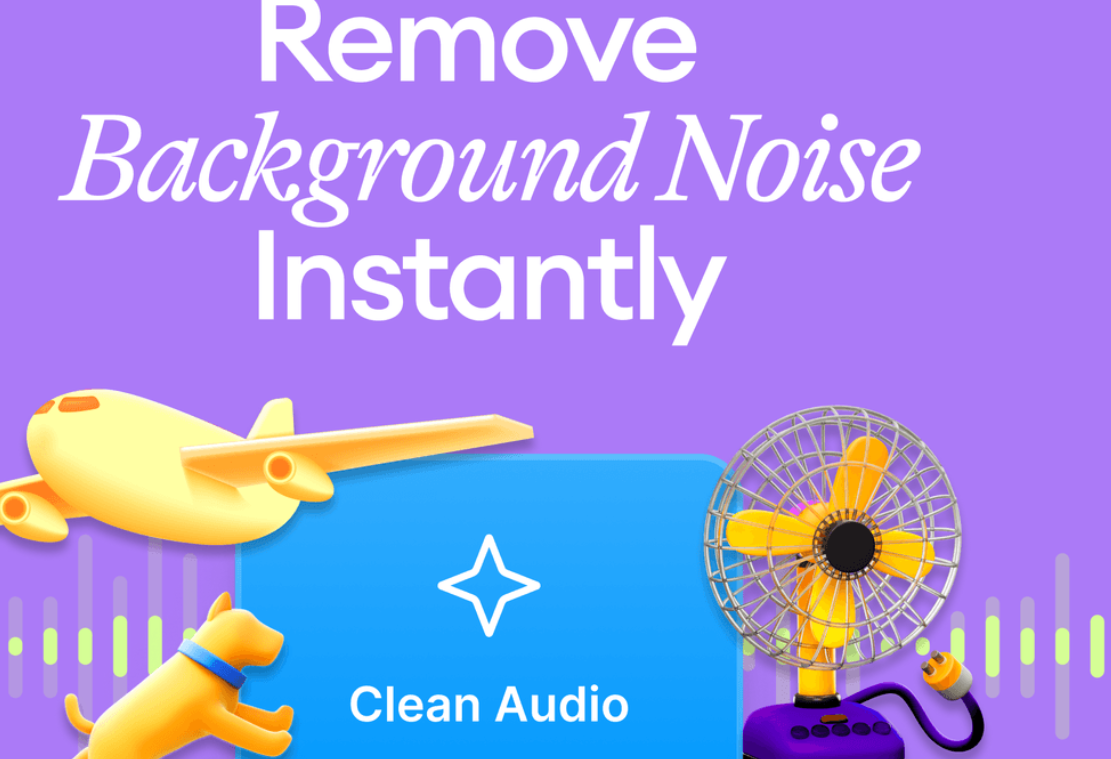
If you want your YouTube channel to grow, you need to clean up voice audio for YouTube videos — and you need to do it right. Bad audio is one of the fastest ways to lose viewers. People will watch a blurry video, but they will click away the moment the sound is hard to listen to. Whether you are recording in a noisy room, using a cheap microphone, or dealing with echo and hiss, this guide will walk you through everything you need to know to fix your audio and sound like a pro.
Why Bad Audio Kills Your YouTube Channel Faster Than Bad Video
Most new YouTubers focus too much on their camera. They spend hundreds of dollars on lenses and lighting — but they record audio with a built-in laptop microphone.
That is a mistake.
Studies show that viewers are far more likely to stop watching a video because of poor audio than because of poor video quality. Your audience can forgive a slightly dark shot. But they will not forgive crackling, hissing, or muffled voices.
Good audio builds trust. It tells your viewer that you are professional, prepared, and worth their time.
The Most Common Voice Audio Problems on YouTube
Before you fix something, you need to know what is broken. Here are the most common audio problems creators face:
| Problem | What It Sounds Like | Common Cause |
|---|---|---|
| Background noise | Hissing, humming, fan sounds | Room noise, HVAC systems |
| Echo / reverb | Voice sounds hollow or “roomy” | Bare walls, large empty rooms |
| Plosives | Popping “P” and “B” sounds | No pop filter on microphone |
| Clipping | Distorted, crackling audio | Recording volume too high |
| Muddy low-end | Bassy, unclear voice | Poor mic placement or cheap mic |
| Sibilance | Harsh “S” and “T” sounds | Mic sensitivity or EQ issues |
Once you identify which problems you have, fixing them becomes much easier.
Set Yourself Up for Better Audio Before You Even Hit Record
The best way to clean up voice audio is to not need to clean it up in the first place. Prevention is always easier than fixing problems in post-production.
Here are some things you can do before recording to get cleaner audio from the start.
Pick the Right Recording Space
Your room matters more than your microphone. A $50 microphone in a treated room will sound better than a $500 microphone in a bad space.
Look for rooms that are:
- Small – smaller rooms have less echo
- Carpeted – carpet absorbs sound reflections
- Filled with soft furniture – couches, curtains, and bookshelves help absorb sound
- Away from outside noise – avoid recording near windows, streets, or loud appliances
Avoid recording in bathrooms, kitchens, or large empty rooms. These spaces create echo that is very hard to remove later.
Treat Your Room Without Spending a Fortune
You do not need a professional recording studio. Some simple DIY tricks can dramatically improve your room acoustics.
- Hang thick blankets or moving blankets on the walls around your recording area
- Record inside a closet full of hanging clothes — this works surprisingly well
- Place foam panels or acoustic tiles on the wall behind your microphone
- Use a reflection filter — a small curved panel that wraps around your mic
These low-cost solutions can take your audio from amateur to professional-sounding before you even touch any software.
Microphone Placement Tips for Cleaner Voice Audio
Where you place your microphone makes a huge difference.
- Keep the mic 6 to 12 inches away from your mouth
- Point the mic slightly off-axis (not directly at your lips) to reduce plosives
- Use a pop filter or windscreen to block harsh “P” and “B” sounds
- Mount the mic on a boom arm to keep it stable and off your desk (desk vibrations cause rumble)
- Never place the mic directly in front of an air vent or fan
The Step-by-Step Process to Clean Up Voice Audio in Post-Production
Even with a great setup, your recordings will almost always need some cleanup. Here is a clear, step-by-step process that works for beginners and experienced creators alike.
Step 1 — Remove Background Noise First
Background noise removal should always be your first step. Trying to do other edits with noise in your audio makes everything harder.
How to do it:
Most audio tools use a process called noise reduction or noise gating.
- Noise reduction analyzes a sample of your background noise (like a few seconds of silence at the start of your recording), then removes that noise pattern from the whole track.
- Noise gates automatically silence the audio track whenever the volume drops below a certain threshold — this cuts out room noise between your sentences.
Free tools that do this well:
- Audacity (completely free, works on Windows and Mac)
- DaVinci Resolve (free video editor with built-in audio tools)
- Adobe Premiere Pro (paid, but excellent noise reduction)
In Audacity, you can remove background noise in just a few clicks:
- Select a section of silence at the beginning of your clip
- Go to Effect → Noise Reduction
- Click Get Noise Profile
- Select your entire audio track
- Go back to Effect → Noise Reduction and click OK
Start with gentle settings. Too much noise reduction makes voices sound robotic or watery.
Step 2 — Use a High-Pass Filter to Cut Muddy Low-End
A high-pass filter removes low-frequency sounds below a certain point. This cleans up rumble, vibration, and muddiness from your voice audio.
For voice recordings, set your high-pass filter to cut everything below 80Hz to 120Hz. Your voice does not need those low frequencies, and removing them makes your audio cleaner and clearer instantly.
Almost every audio editor and plugin has a high-pass filter (sometimes called a “low-cut filter”).
Step 3 — Apply Equalization (EQ) to Shape Your Voice
EQ lets you boost or cut specific frequency ranges to improve how your voice sounds.
Here is a simple EQ guide for voice audio:
| Frequency Range | What It Controls | What to Do |
|---|---|---|
| Below 80Hz | Rumble, vibration | Cut with high-pass filter |
| 80Hz – 250Hz | Warmth, body of the voice | Slight cut if voice sounds muddy |
| 250Hz – 500Hz | Muddiness | Cut slightly if voice sounds unclear |
| 1kHz – 3kHz | Presence, clarity | Boost slightly to add clarity |
| 3kHz – 8kHz | Brightness, “air” | Boost slightly for crispness |
| Above 10kHz | Harshness, sibilance | Cut if “S” sounds are too sharp |
You do not need to touch every frequency. Start by cutting problem areas first, then add small boosts only where needed. Less is more with EQ.
Step 4 — Control Dynamics With Compression
Compression makes quiet parts louder and loud parts quieter. This evens out your voice so it stays at a consistent volume throughout your video.
Without compression, your voice might spike when you get excited and then drop too quiet when you slow down. Viewers hate constantly adjusting their volume.
Simple compression settings for YouTube voice audio:
- Ratio: 3:1 to 4:1
- Attack: 10ms
- Release: 100ms
- Threshold: Set so the compressor engages on your loudest peaks
Start gentle. Over-compression makes your voice sound flat and lifeless.
Step 5 — Use a De-Esser to Tame Harsh “S” Sounds
Sibilance is that sharp, hissing quality on “S,” “T,” and “SH” sounds. It can be very unpleasant on headphones.
A de-esser is a special tool that automatically reduces harsh high-frequency sounds specifically in the range where sibilance lives (usually around 5kHz to 10kHz).
Many free plugins include a de-esser. In Audacity, you can reduce sibilance manually using EQ. In Adobe Audition, there is a built-in de-esser effect.
Step 6 — Normalize or Limit Your Audio for YouTube
YouTube has a specific loudness standard: -14 LUFS (Loudness Units relative to Full Scale). If your audio is too loud or too quiet, YouTube will automatically adjust it — and the results are not always great.
It is better to export your audio at the right level yourself.
Use a limiter at the end of your audio chain to make sure your audio never peaks above -1dBTP (true peak). Then normalize your overall loudness to around -14 LUFS.
Tools like Youlean Loudness Meter (free) can help you measure your LUFS level before you export.
Best Free and Paid Tools to Clean Up Voice Audio for YouTube
You do not need to spend a lot of money to get great-sounding audio. Here is a breakdown of the best tools available right now.
Free Audio Cleaning Tools
Audacity Audacity is the most popular free audio editor in the world. It has noise reduction, EQ, compression, and many other tools built right in. It is perfect for beginners.
DaVinci Resolve DaVinci Resolve is a free video editor with a surprisingly powerful audio workspace called Fairlight. It includes noise reduction, EQ, compression, and loudness metering — all free.
Adobe Podcast (Enhance Speech) Adobe offers a free web-based tool called Adobe Podcast Enhance Speech. You upload your audio file, and their AI cleans it up automatically. It works incredibly well and takes less than a minute.
Krisp Krisp is a free (with limits) app that removes background noise in real time as you record. This means you get cleaner audio without any post-production work.
Paid Audio Cleaning Tools Worth the Investment
| Tool | Price | Best For |
|---|---|---|
| Adobe Audition | ~$20/month | Full-featured professional editing |
| iZotope RX | $99–$399 | Advanced noise removal and repair |
| Waves NS1 | ~$29 | Simple one-knob noise suppression |
| Accusonus ERA Bundle | ~$99/year | Easy-to-use repair plugins |
For most YouTubers, the free tools are more than enough. Only upgrade to paid tools if you are dealing with very difficult recordings or working professionally.
AI-Powered Audio Cleaning: The Future Is Already Here
Artificial intelligence has completely changed audio cleanup. Tools that used to require hours of manual work can now be done in seconds.
Top AI Audio Cleanup Tools for YouTube Creators
Adobe Podcast Enhance Speech As mentioned above, this free AI tool can take a recording made in a noisy room and make it sound like it was recorded in a professional studio. It is one of the best free tools available.
NVIDIA RTX Voice / RTX Broadcast If you have an NVIDIA graphics card, RTX Broadcast removes background noise in real time using AI. It works for both recording and live streaming.
Descript Descript is an AI-powered video and podcast editor. It includes Studio Sound, a one-click AI feature that cleans up and enhances your voice audio automatically.
Cleanvoice AI Cleanvoice removes filler words (like “um” and “uh”), mouth clicks, stutters, and background noise automatically using AI. It saves a huge amount of editing time.
These AI tools are not perfect, but they are getting better every month. For many creators, they can completely replace manual audio editing.
Audio Cleanup Workflow: A Simple Chart for YouTube Creators
Here is the recommended order of operations for cleaning up voice audio:
RAW RECORDING
      ↓
1. Noise Reduction (remove background noise)
      ↓
2. High-Pass Filter (cut low-end rumble)
      ↓
3. EQ (shape and clarify your voice)
      ↓
4. De-Esser (tame harsh "S" sounds)
      ↓
5. Compression (even out volume dynamics)
      ↓
6. Limiting + Loudness Normalization (-14 LUFS for YouTube)
      ↓
FINAL EXPORT
Following this order gives you the best results. Skipping steps or doing them in the wrong order can cause problems.
Common Mistakes Creators Make When Cleaning Up Voice Audio
Even with the right tools, it is easy to make mistakes. Here are the most common ones — and how to avoid them.
Over-Processing Your Audio
More is not always better. Applying too much noise reduction, too much compression, or too much EQ can make your voice sound unnatural, robotic, or flat.
Always compare your processed audio to the original. If the processed version sounds worse in any way, pull back your settings.
Skipping the Noise Profile Step
In Audacity and similar tools, you must give the software a “noise profile” — a sample of your background noise — before it can remove it. Skipping this step means the software has to guess, and it often guesses wrong.
Always record 2 to 3 seconds of silence at the start of every recording session. This gives you a clean noise profile to work from.
Not Monitoring on Headphones
Speakers in a room add their own acoustic coloring to what you hear. Always monitor your final audio on headphones before exporting. This lets you hear exactly what your viewers will hear.
Exporting in the Wrong Format
For YouTube, always export your audio as:
- Format: AAC or MP3
- Sample Rate: 48,000 Hz
- Bit Depth: 16-bit or 24-bit
- Loudness: -14 LUFS
If you export at a lower quality or wrong sample rate, YouTube may re-encode your audio and reduce its quality.
How Professional YouTubers Handle Voice Audio
Want to know what the top YouTubers are actually doing? Many of them follow a simple but effective workflow.
For more tips on growing your channel and producing better content, check out resources at https://www.cryptonews21.com — a great hub for digital content creators and tech enthusiasts.
For an even deeper look at professional audio mastering standards, the Audio Engineering Society (AES) at https://www.aes.org offers extensive documentation on broadcast and online audio guidelines.
Most top YouTubers:
- Record in treated spaces — closets, padded rooms, or with acoustic panels
- Use a quality dynamic or condenser microphone — popular choices include the Shure SM7B, Audio-Technica AT2020, and Rode NT-USB
- Run a simple cleanup chain in Adobe Audition, Logic Pro, or DaVinci Resolve
- Use AI tools for quick fixes when they are in a rush
- Always check loudness levels before uploading
You do not need to match a Hollywood production. You just need to be consistent and clear.
FAQs: Clean Up Voice Audio for YouTube Videos
Q: What is the easiest free tool to clean up voice audio for YouTube? A: Audacity is the most popular free option and works great for beginners. Adobe Podcast Enhance Speech is even easier — just upload your file and the AI does the work for you.
Q: How do I remove background noise from a YouTube video recording? A: Use noise reduction in Audacity or another audio editor. Record a few seconds of silence first, then use that as your noise profile. Apply the noise reduction gently so your voice does not sound robotic.
Q: What loudness level should my YouTube audio be? A: YouTube recommends -14 LUFS for integrated loudness. Use a loudness meter like Youlean to check your levels before you export.
Q: Can I clean up audio directly inside my video editor? A: Yes. DaVinci Resolve, Adobe Premiere Pro, and Final Cut Pro all have built-in audio tools that let you clean up voice audio without switching to a separate program.
Q: Why does my voice sound robotic after noise reduction? A: You have applied too much noise reduction. Lower the strength of the effect until your voice sounds natural again. A little noise in the background is better than a robotic-sounding voice.
Q: Do I need an expensive microphone to get good audio? A: Not necessarily. A decent microphone in a treated room will outperform an expensive mic in a bad space. Focus on your recording environment first, then upgrade your gear.
Q: What is the difference between noise reduction and a noise gate? A: Noise reduction removes a specific noise pattern (like a fan hum) from your audio. A noise gate silences the track when you are not speaking, cutting out room noise between sentences. Both tools work well together.
Q: How do I fix echo in my YouTube video audio? A: Echo is the hardest problem to fix in post-production. Prevention is the best solution — record in smaller, softer rooms. If you already have echo, tools like iZotope RX have a “room tone” reduction feature that can help.
Wrap-Up: Great Audio Is a Game-Changer for Your Channel
Learning to clean up voice audio for YouTube videos is one of the highest-impact skills you can develop as a creator. It does not take expensive gear or years of experience. With the right tools and a simple workflow, you can go from muddy, noisy recordings to clear, professional-sounding audio in a short amount of time.
Start with your recording space. Then learn your tools. Follow the cleanup steps in order. And always check your final mix on headphones before you upload.
Your viewers will notice the difference. And they will keep coming back because of it.
Good audio is not just a technical detail — it is a sign of respect for your audience’s time and attention. Give them the best experience you can, and your channel will grow for it.