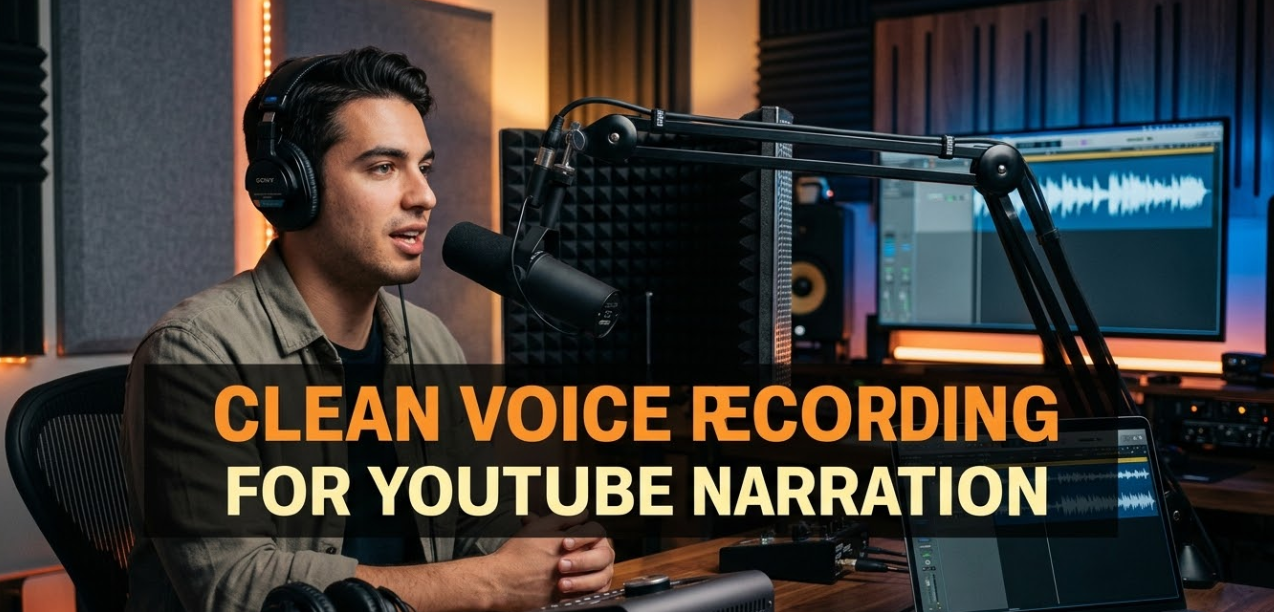
If you’ve ever watched a YouTube video and immediately clicked away because the audio sounded muffled, echoy, or full of background noise — you already understand the power of clean voice recording for YouTube narration. Audio quality can make or break a YouTube channel. Viewers forgive slightly lower video quality, but bad audio? They’re gone in seconds. Whether you’re just starting out or looking to level up your existing setup, this guide will walk you through everything you need to capture crisp, professional-sounding narration — without spending a fortune.
Why Audio Quality Matters More Than You Think
Most new YouTubers obsess over cameras and video editing tools. But here’s a truth the pros know: your microphone and your recording environment matter far more than your camera.
Think about it. People can watch a slightly grainy video if the content is good. But if the voice sounds like it was recorded in a bathroom or a wind tunnel, the viewer’s brain works overtime just to understand what’s being said. That mental effort kills the experience fast.
Studies in media psychology consistently show that poor audio causes viewers to perceive the content itself as lower quality — even if the information is excellent. In short, great audio makes you sound credible, professional, and trustworthy.
So before you upgrade your camera, invest in your voice recording setup.
The Gear You Actually Need (No Fluff)
You don’t need a $5,000 studio to get clean narration audio. But you do need the right gear. Here’s a simple breakdown:
Microphone Types for YouTube Voice Recording
| Microphone Type | Best For | Pros | Cons |
|---|---|---|---|
| USB Condenser | Beginners, desktops | Easy setup, great quality | Picks up room noise |
| XLR Condenser | Intermediate to pro | Superior sound, flexible | Needs audio interface |
| Dynamic (USB or XLR) | Noisy rooms | Rejects background noise | Slightly less detail |
| Lavalier (Lapel Mic) | On-camera talking head | Hands-free, portable | Can rub against clothes |
Top beginner picks:
- Blue Yeti — USB, plug-and-play, great for quiet rooms
- Audio-Technica AT2020 — XLR, excellent clarity, popular for narration
- Shure SM7B — Used by podcasters and YouTubers worldwide, handles room noise well
Do You Need an Audio Interface?
If you go with an XLR mic, yes — you’ll need an audio interface. Think of it as the bridge between your mic and your computer. The Focusrite Scarlett Solo and the PreSonus AudioBox are two affordable, reliable options that work well for YouTube narration setups.
If you’re on a budget, a solid USB microphone gets you 80% of the way there with zero extra gear.
Setting Up Your Recording Space
Here’s a secret: your room is half your microphone. Even the most expensive mic will sound terrible in a bad acoustic environment. Getting clean voice recording for YouTube narration starts with your physical space.
How Room Acoustics Affect Your Voice
Sound bounces. Hard surfaces — walls, floors, windows, desks — reflect sound waves back toward your microphone. Those reflections cause what’s called reverb (an echo-like effect) and room tone (the ambient hum of your space). Together, they make your voice sound hollow and unprofessional.
Your goal is to absorb those sound waves before they bounce back.
Easy and Affordable Room Treatment Options
You don’t need to nail foam panels to every wall. Here are practical options:
- Record in a small room — Smaller spaces have less reverb than large, open rooms.
- Use soft furnishings — Couches, rugs, curtains, and bookshelves full of books naturally absorb sound.
- Build a “pillow fort” setup — Seriously. Surround yourself with pillows, blankets, or hang heavy curtains around your recording area. This is a legit technique used by many small creators.
- Record in a closet — Clothes act as acoustic panels. A walk-in closet full of hanging clothes is one of the best natural recording spaces you can find.
- Use acoustic foam panels — If you want a dedicated setup, panels like those from Auralex or Amazon basics versions can significantly reduce echo in a home studio corner.
Microphone Placement: The Small Detail That Makes a Huge Difference
You could have perfect acoustics and a top-tier mic, and still ruin the recording by placing the microphone wrong.
The Right Distance
For narration recording, position your microphone 6 to 12 inches from your mouth. Too close and you’ll get plosives (popping sounds on “P” and “B” sounds) and proximity effect (an unnatural bass boost). Too far and the room noise takes over.
The Right Angle
Point the mic slightly off-axis — meaning don’t speak directly into it head-on. Angle it slightly to one side (about 10–15 degrees off-center). This dramatically reduces plosives and harsh “S” sounds (called sibilance).
Use a Pop Filter
A pop filter is that round mesh screen you often see in front of studio microphones. It diffuses the burst of air from “P,” “B,” and “T” sounds before they hit the microphone capsule. You can buy one for under $10, or make a simple one with a wire hanger and pantyhose. It genuinely works.
Use a Shock Mount
A shock mount is the spider-like cradle that holds your microphone. It isolates the mic from vibrations traveling through your desk — like the rumble of a fan, footsteps, or typing. If your mic stand sits on your desk and you type while recording, a shock mount is essential.
Recording Settings and Software
Getting clean voice recording for YouTube narration isn’t just about hardware. Your recording software settings matter a lot too.
Recommended Sample Rate and Bit Depth
| Setting | Recommended Value | Why |
|---|---|---|
| Sample Rate | 44.1 kHz or 48 kHz | Standard for video; YouTube accepts both |
| Bit Depth | 24-bit | More headroom, less noise floor |
| Channels | Mono | Voice narration is always mono |
| File Format | WAV (uncompressed) | Highest quality for editing; export to MP3 later |
Always record in WAV format at 24-bit/48kHz. You can compress it to MP3 later during export. Recording compressed from the start means you lose quality you can never get back.
Best Free and Paid Recording Software
Free Options:
- Audacity — Open-source, beginner-friendly, works on Windows and Mac
- GarageBand — Mac only, surprisingly powerful for narration
Paid Options:
- Adobe Audition — Industry standard, great for noise reduction and mastering
- Reaper — Affordable, professional-grade DAW
- Logic Pro — Mac only, fantastic for audio quality and processing
Setting Your Input Levels Correctly
One of the most common beginner mistakes is recording too loud or too quiet. Both cause problems.
Too loud — The signal clips (distorts), and there’s no fix in post-production.
Too quiet — You have to boost the volume later, which brings up background noise and makes the signal hissy.
The sweet spot for voice narration is keeping your peak levels between -12 dB and -6 dB on the meter. The loudest parts of your voice should never hit 0 dB (the red zone).
Most recording software and audio interfaces show a visual meter. Watch it while you do a test recording. Speak at the same volume you plan to record at — not softer — and adjust your gain (input volume) until your peaks land in that -12 to -6 dB range.
Dealing With Background Noise
Even in a well-treated room, background noise can creep in. Fans, air conditioning units, street noise, neighbors, refrigerator hums — all of it shows up in a microphone.
Before You Hit Record: Eliminate the Source
- Turn off fans, air conditioners, and heaters for the duration of your recording session
- Unplug humming electronics nearby
- Put your phone on silent and flip it face-down
- Alert people in your home that you’re recording
- Record at quieter times of day (early morning often has the least environmental noise)
Noise Reduction in Post-Production
If noise still makes it into your recording, software can help reduce it. The key word is reduce — not eliminate perfectly. Heavy-handed noise reduction makes your voice sound robotic and unnatural.
How to use Audacity’s noise reduction:
- Find a short clip of just the room noise (before you start speaking — 2 to 3 seconds of silence)
- Highlight that section
- Go to Effects → Noise Reduction → “Get Noise Profile”
- Select the entire recording, then apply the effect at low settings (around 6–12 dB reduction)
- Preview and adjust until it sounds natural
Adobe Audition has a similar tool called Noise Reduction (process) that works even better. Newer AI-based tools like NVIDIA RTX Voice, Krisp, and Adobe Podcast Enhance can remove background noise in real time or in post with remarkable results.
Post-Processing Your Voice: Make It Sound Pro
Recording is only half the job. How you process the audio afterward defines the final listener experience. Here’s a simple but effective narration processing chain:
Step 1 — Noise Reduction
Always the first step. Clean up the noise floor before doing anything else.
Step 2 — EQ (Equalization)
EQ shapes the tone of your voice. For YouTube narration, a gentle EQ approach works best:
- High-pass filter at 80–100 Hz — Cuts rumble and low-end mud
- Slight boost around 2–4 kHz — Adds presence and clarity; makes your voice cut through
- Gentle roll-off above 12–14 kHz — Tames harshness if needed
You don’t need dramatic boosts or cuts. Small adjustments (2–4 dB) go a long way.
Step 3 — Compression
Compression evens out the volume differences in your voice. When you get louder, the compressor turns it down slightly. When you’re softer, it lets it through. The result is a more consistent, polished sound.
Recommended starting settings for narration:
- Ratio: 3:1 or 4:1
- Threshold: Around -18 to -20 dB
- Attack: 10–20ms
- Release: 80–120ms
- Make-up gain: Adjust to bring the overall volume back up
Step 4 — De-esser (Optional)
If your “S” sounds are particularly sharp or hissy, a de-esser targets that specific frequency range and softens it. Most DAWs have a built-in de-esser plugin.
Step 5 — Final Volume (Loudness Normalization)
YouTube normalizes audio to about -14 LUFS. You should aim to export your narration at around -16 to -14 LUFS (Loudness Units relative to Full Scale). Tools like Audacity’s “Loudness Normalization” or iZotope’s RX Loudness Control can help hit this target accurately.
Common Mistakes That Destroy Clean Audio
Let’s be real — most audio problems come down to a handful of repeated mistakes. Here’s what to avoid:
Mistake #1: Recording in a Live Room
A room with bare walls, hardwood floors, and high ceilings is the enemy of clean narration. Always treat your space first.
Mistake #2: Gain Too High
Cranking the gain on your interface or mic to maximum isn’t “louder is better.” It introduces noise and clipping. Set it right — aim for that -12 to -6 dB sweet spot.
Mistake #3: Skipping the Pop Filter
Plosives are brutal in narration. A pop filter costs less than a meal out. Use one.
Mistake #4: Not Monitoring With Headphones
Always record with closed-back headphones on. You need to hear what the microphone actually hears — not what your ears hear in the room. Open-back headphones or speakers will bleed sound back into the mic.
Mistake #5: Editing Out Pauses Too Aggressively
Natural pauses are part of narration rhythm. When you chop every breath and silence, the voice sounds rushed and robotic. Leave a little breathing room between sentences.
Clean Voice Recording Tips for Beginners: Quick-Reference Table
| Tip | Why It Matters |
|---|---|
| Record in a treated room | Reduces echo and reverb |
| Keep mic 6–12 inches away | Prevents distortion and room noise |
| Use a pop filter | Eliminates plosive pops |
| Record at -12 to -6 dB | Avoids clipping and noise issues |
| Use closed-back headphones | Hear exactly what mic hears |
| Record in WAV at 24-bit | Maximum quality for editing |
| Apply noise reduction gently | Keeps voice sounding natural |
| Target -14 LUFS on export | Matches YouTube loudness standards |
Voice Delivery Tips That Affect Recording Quality
Clean voice recording for YouTube narration isn’t just technical. How you deliver your narration physically affects audio quality too.
Hydration — Drink water before recording. Dry mouths produce click and smack sounds that microphones pick up clearly.
Posture — Sit or stand up straight. Slouching compresses your diaphragm and makes your voice sound thinner.
Warm up your voice — Do some gentle humming, tongue twisters, or light vocal exercises before hitting record. A warmed-up voice sounds more open and natural.
Read your script out loud first — Go through your script once before recording it. This helps you find awkward phrasing, avoid stumbling, and figure out where to breathe naturally.
Smile while narrating — It sounds odd, but a slight smile changes the shape of your mouth and brightens your vocal tone. Viewers can hear a smile even if they can’t see it.
Budget vs. Pro Setup Comparison
| Setup Level | Mic | Interface | Acoustics | Approx. Cost |
|---|---|---|---|---|
| Budget Starter | Blue Snowball (USB) | None needed | Blanket/closet | $50–$80 |
| Mid-Range | AT2020 (XLR) | Focusrite Scarlett Solo | Foam panels + rugs | $200–$350 |
| Semi-Pro | Rode NT1 (XLR) | Universal Audio Volt 2 | Acoustic tiles + bass traps | $500–$800 |
| Full Pro | Shure SM7B (XLR) | Apollo Solo | Full room treatment | $1,000+ |
You can start at the budget level and still produce surprisingly clean narration if your room is treated well. Don’t let gear hold you back from starting.
Want more creator tips and tech guides? Check out Cryptonews21 for more helpful content across tech, tools, and digital media. For deeper technical audio education, the Recording Revolution is an excellent external resource for home studio recording techniques.
FAQs: Clean Voice Recording for YouTube Narration
Q1: What is the best microphone for clean voice recording for YouTube narration on a budget?
The Blue Snowball and Samson Q2U are both excellent budget picks under $70. The Samson Q2U is especially great because it works as both USB and XLR, giving you room to grow your setup later.
Q2: Do I need soundproofing or acoustic treatment?
These are two different things. Soundproofing prevents sound from entering or leaving a room (very expensive). Acoustic treatment controls how sound behaves inside the room (very affordable). For YouTube narration, acoustic treatment is what you actually need — and you can DIY it with blankets, pillows, and furniture.
Q3: Why does my voice sound echoey even with a good mic?
Echo and reverb come from your room, not your microphone. Your mic is picking up reflections from hard surfaces. Treat your room with soft materials, or record in a smaller, more furnished space.
Q4: How loud should my narration be when I export it for YouTube?
Aim for -14 LUFS integrated loudness. YouTube’s algorithm normalizes louder videos down to this level anyway, so mastering near -14 LUFS ensures your audio sounds exactly how you intend it.
Q5: What’s the difference between a condenser and a dynamic microphone for narration?
Condenser microphones are more sensitive and capture more detail — great for quiet, treated rooms. Dynamic microphones are less sensitive and reject background noise better — ideal for noisier environments. For most home narration setups, a condenser with some basic room treatment gives the best result.
Q6: Can I use my phone or laptop microphone for YouTube narration?
You can, but the results will be noticeably lower quality. Built-in mics have very small capsules, poor noise rejection, and limited dynamic range. Even a $30 USB mic will make a significant improvement over any built-in mic.
Q7: Should I record narration separately from my screen recording or video capture?
Yes, always. Record your narration audio as a separate track. This gives you full control over editing, processing, and syncing in post-production. Mixing narration directly into a screen recording makes fixing mistakes much harder.
Q8: How do I reduce the “mouth sounds” (clicks and smacks) in my recordings?
Drink water before recording. Avoid dairy products and coffee right before a session (they coat the throat and increase mouth noise). You can also use the DeClick tool in iZotope RX or a similar plugin to remove individual mouth clicks in post.
Final Thoughts: Your Audio Journey Starts Now
Clean voice recording for YouTube narration doesn’t require a professional studio or a massive budget. It requires the right knowledge, a little preparation, and consistent practice.
Start with what you have. Treat your room with what you own. Record often, listen critically, and improve gradually. The biggest jump in audio quality usually comes from fixing your room acoustics — not from buying an expensive new microphone.
Great audio builds trust with your audience. It signals that you respect their time and their ears. And in a sea of millions of YouTube videos competing for attention, that respect goes a long way.
Take these steps one at a time, implement them into your recording workflow, and watch — and hear — the difference it makes.