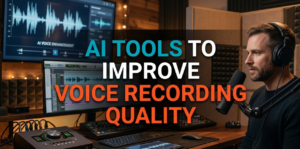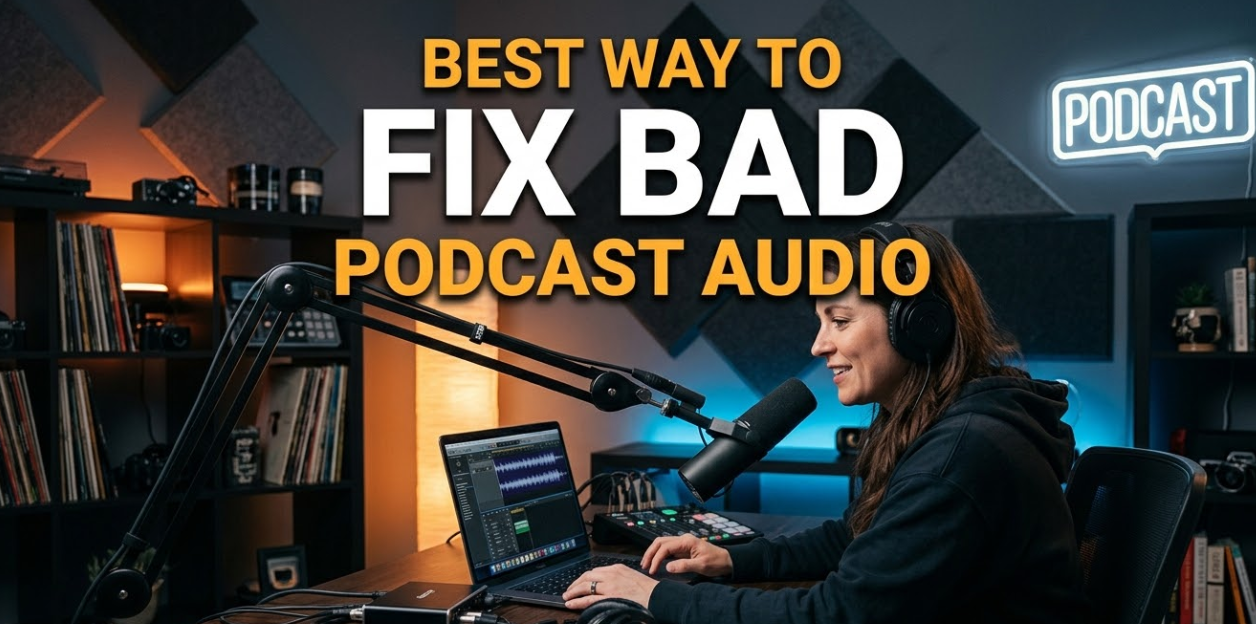
If you’ve ever listened to a podcast and cringed at the echo, hiss, or muffled voices, you already know how much bad audio kills a show. Whether you’re just starting out or you’ve been recording for a while, fixing bad podcast audio is one of the most important skills you can develop. Good sound keeps listeners coming back. Bad sound drives them away — fast.
In this guide, you’ll learn the best ways to fix bad podcast audio from start to finish. We’ll cover everything from recording setup to editing tricks, so your show sounds clean, clear, and professional — no expensive studio required.
Why Podcast Audio Quality Matters More Than You Think
Listeners are surprisingly picky about audio. Studies have shown that people will stop listening to a podcast within the first few minutes if the audio is hard to hear or full of distracting noise. It doesn’t matter how great your content is — if the audio quality is poor, most people won’t stick around.
Here’s the truth: you don’t need a $10,000 studio to sound good. You just need to know the right steps.
The Most Common Podcast Audio Problems
Before you can fix bad podcast audio, you need to know what you’re dealing with. Here are the most common audio issues podcasters face:
| Audio Problem | What It Sounds Like | Common Cause |
|---|---|---|
| Background noise | Hissing, humming, or fan sounds | Poor microphone placement or cheap mic |
| Room echo / reverb | Voice sounds hollow or “roomy” | Recording in an untreated room |
| Plosives | Popping “P” and “B” sounds | No pop filter or wrong mic angle |
| Low volume / gain | Voice sounds too quiet | Incorrect recording levels |
| Clipping / distortion | Crackling or fuzzy audio | Recording level set too high |
| Mic handling noise | Thumping or rumbling | Moving the mic while recording |
| Uneven levels | One person is louder than another | No level matching or compression |
Once you identify the problem, fixing it becomes much easier.
Start at the Source: Get the Recording Right
The best way to fix bad podcast audio is to avoid it in the first place. Editing can only do so much. If your recording is terrible, no software will fully save it.
Choose the Right Microphone
You don’t need the most expensive mic, but you do need the right type. USB microphones like the Blue Yeti or Audio-Technica AT2020USB+ are great for beginners. For more control, XLR microphones paired with an audio interface give better results.
The key thing to look for is a cardioid polar pattern. This means the mic picks up sound from the front and rejects noise from the sides and back. It’s perfect for podcast recording in non-treated rooms.
Set Up Your Recording Space
Your room is your biggest enemy. Hard walls, tile floors, and bare ceilings bounce sound around and create echo. Here’s how to fix that:
- Record in a small room filled with soft materials — a closet works great.
- Hang blankets or curtains on walls to absorb sound.
- Use a rug on the floor to cut floor reflections.
- Close windows and doors to block outside noise.
- Turn off fans, air conditioners, and appliances before you hit record.
Even placing a few pillows around your microphone can make a noticeable difference. Think of it as building a tiny recording booth without spending a fortune.
Position Your Microphone Correctly
Most podcasters hold or place the mic wrong. Here’s the right way:
- Keep the mic 4–8 inches from your mouth.
- Point it slightly off-axis (angled slightly away from your direct breath path) to reduce plosives.
- Use a pop filter or windscreen to block plosive air bursts.
- Place the mic on a stable boom arm or stand to prevent handling noise.
Getting this right before you press record saves you hours of editing later.
Recording Levels: Getting Your Gain Right
One of the sneakiest causes of bad podcast audio is incorrect gain (volume) settings. Too low and your audio sounds quiet and noisy. Too high and it clips and distorts.
What to Aim For
Target a recording level of -12 dB to -6 dB on your audio meter. This gives you enough volume while leaving “headroom” so your audio doesn’t clip when you get excited or raise your voice.
Most recording software like Audacity, GarageBand, Adobe Audition, and Reaper shows a level meter. Watch it while you do a test recording. Adjust your gain until you’re consistently hitting that sweet spot.
Quick tip: Always do a 30-second test recording before your actual session. Play it back with headphones and listen for any background noise, humming, or echo. It’s much easier to fix a problem before recording than after.
How to Fix Bad Podcast Audio in Post-Production
Even with the best setup, your recording will probably need some cleanup. This is where post-production editing comes in. Here are the most effective steps to fix bad podcast audio in your editing software.
Step 1 — Remove Background Noise
This is usually the first thing to tackle. Noise reduction tools analyze the “noise floor” of your recording (the hiss or hum when no one is talking) and subtract it from the rest of the audio.
How to do it in Audacity (free):
- Select a few seconds of pure background noise (no talking).
- Go to Effect → Noise Reduction.
- Click “Get Noise Profile.”
- Select your entire recording.
- Apply Noise Reduction with settings around 12 dB reduction.
Paid options like iZotope RX, Adobe Audition, and Descript use AI-powered noise removal that’s even more powerful and easier to use.
Be careful not to over-apply noise reduction. Too much can make voices sound robotic or “watery.” Less is often more.
Step 2 — Apply a High-Pass Filter
A high-pass filter cuts out low-frequency rumble below 80–100 Hz. This removes sounds like traffic vibrations, HVAC hum, and desk bumps that you might not even hear but that muddy your audio.
In most editors, this is under:
- Effect → Filter → High Pass Filter
- Or inside an EQ plugin — simply cut everything below 80 Hz with a steep slope.
This one step alone can make a recording sound significantly cleaner.
Step 3 — Fix Room Echo and Reverb
Room echo is one of the hardest problems to fix after the fact. That’s why prevention is so important. But if you’re stuck with a reverby recording, there are tools that can help.
iZotope RX De-Reverb is the industry standard for this. It intelligently removes reverb while preserving the natural sound of the voice. Audacity doesn’t have a built-in de-reverb tool, but free plugins like ReaFIR (part of the Reaper suite) can work.
For mild echo, applying a multiband compressor and EQ to reduce the mid-range frequencies (where reverb often lives) can help tighten things up.
Step 4 — Use Compression to Even Out Volume
Compression is one of the most powerful tools for improving podcast audio. It automatically turns down loud sounds and turns up quiet sounds, making your voice consistent and easy to listen to.
Recommended compression settings for podcasts:
- Ratio: 3:1 to 4:1
- Attack: 10–20 ms
- Release: 100–200 ms
- Threshold: Around -18 dB (adjust based on your recording levels)
Don’t over-compress — too much can make your voice sound flat or “pumping.”
Step 5 — EQ Your Voice for Clarity
EQ (equalization) shapes the tonal quality of your voice. Even a gentle EQ pass can make a big difference.
Basic EQ settings for a podcast voice:
- Cut below 80 Hz (high-pass filter — removes rumble)
- Cut around 200–300 Hz if the voice sounds muddy or boomy
- Boost around 2–5 kHz slightly for presence and clarity
- Cut any harsh frequencies above 8 kHz if there’s harshness or sibilance
Every voice and microphone is different, so use your ears. Make small adjustments and listen back each time.
Step 6 — De-Ess Sibilance
Sibilance is that sharp, hissing “S” sound that can be irritating in vocal recordings. A de-esser plugin targets those high frequencies and smooths them out.
Most DAWs (Digital Audio Workstations) include a built-in de-esser. Free options like Spitfish (PC) work great. Target the 5–9 kHz range where sibilance typically lives.
Step 7 — Normalize and Loudness Match
The final step is to make sure your episode is at the right volume for podcast platforms.
Podcast loudness standards:
- Spotify & Apple Podcasts: -16 LUFS (integrated)
- YouTube: -14 LUFS
- General broadcast: -16 to -18 LUFS
Use a tool like Auphonic (free for limited use) or your editor’s loudness normalization tool to hit the right target. This ensures your podcast sounds consistent with other shows, and listeners won’t have to constantly adjust their volume.
Best Free and Paid Tools to Fix Podcast Audio
You don’t need to spend a fortune to get great results. Here’s a breakdown of the best tools available right now.
Free Audio Editing Tools
Audacity — The most popular free audio editor. It handles noise reduction, EQ, compression, normalization, and more. It’s not the prettiest interface, but it gets the job done.
GarageBand (Mac only) — Simple, clean, and surprisingly powerful for basic podcast editing. Great for beginners on Apple devices.
Reaper — A full-featured DAW available for a discounted license. Tons of built-in plugins and one of the most flexible editing environments available.
Paid Audio Tools Worth Considering
Adobe Audition — A professional-grade editor with excellent noise reduction and a full suite of audio repair tools. Part of the Adobe Creative Cloud subscription.
iZotope RX — The gold standard for audio repair. Used by professional studios worldwide. If you have serious audio problems (bad echo, heavy noise), this is worth the investment.
Descript — A unique tool that lets you edit audio like a text document. It also has one of the best AI-powered noise removal features on the market. Great for podcasters who don’t want to learn traditional audio editing.
Auphonic — A web-based tool that automatically levels your audio, removes noise, and exports at the right loudness for podcast platforms. Perfect for quick, automated cleanup.
Remote Recording: Fixing Bad Audio from Guests
One of the trickiest podcast audio challenges is when you’re interviewing guests remotely. You can’t control their microphone, their room, or their internet connection.
Tips for Getting Good Remote Audio
- Ask guests to use headphones. This prevents their speaker audio from bleeding back into the microphone.
- Recommend a good USB mic. Even a $50 microphone is a massive upgrade over a built-in laptop mic.
- Record locally when possible. Tools like Riverside.fm, SquadCast, and Zencastr record each person’s audio locally and upload it as a separate file. This avoids internet compression and connection drops.
- Use AI-powered cleanup tools on guest tracks separately. iZotope RX and Descript can be applied individually to each track.
For more tools, resources, and tech recommendations for podcasters, check out resources at Cryptonews21 — a hub covering digital media, tools, and online publishing strategies.
Exporting Your Podcast the Right Way
Once your audio is cleaned up and edited, you need to export it correctly. The wrong export settings can undo all your hard work.
Recommended Export Settings
| Setting | Recommended Value |
|---|---|
| Format | MP3 |
| Bit Rate | 128 kbps (mono) or 192 kbps (stereo) |
| Sample Rate | 44,100 Hz (44.1 kHz) |
| Channels | Mono (for solo shows), Stereo (for music or multi-person) |
| Loudness | -16 LUFS (integrated) |
Why mono? Most podcast listeners use earbuds or a single phone speaker. Mono audio sounds just as good as stereo in this context and results in a smaller file size.
Advanced Tips: Taking Your Podcast Audio to the Next Level
Once you’ve mastered the basics, these advanced techniques will help you squeeze even more quality out of your recordings.
Use a Multiband Compressor
A standard compressor treats the entire audio signal equally. A multiband compressor splits the audio into frequency bands and compresses each one separately. This gives you much more control over how the voice sounds and helps tame specific problem areas.
Add a Limiter at the End of Your Chain
A limiter is like a safety net. It prevents your audio from ever going above a set ceiling (usually -1 dB). This protects against any random loud spikes that could cause clipping.
Record a Room Tone Sample
At the start of every session, record 30 seconds of complete silence (no talking, no moving). This is your “room tone” and serves as a reference for your noise reduction tool. It makes automatic noise profiling much more accurate.
Sync Multi-Track Recordings
If you and your guest each record locally, you’ll need to sync the tracks in your editor. Use a simple technique: clap once at the start of the recording. The sharp transient of the clap appears clearly on both waveforms, making it easy to line them up.
Try AI-Powered Podcast Enhancement
New AI tools are changing the game for podcast audio. Services like Adobe Podcast Enhance use machine learning to automatically clean up and enhance audio — sometimes with jaw-dropping results. It’s free to try and works well even on mediocre recordings. This is one of the best new ways to fix bad podcast audio quickly.
Quick Comparison: Recording Environments
Not all recording spaces are created equal. Here’s a quick look at how different environments stack up.
| Environment | Echo Level | Background Noise | Overall Quality |
|---|---|---|---|
| Professional recording studio | None | None | Excellent |
| Dedicated home studio (treated) | Very Low | Very Low | Excellent |
| Closet with clothes | Low | Low | Very Good |
| Small carpeted bedroom | Low–Medium | Medium | Good |
| Living room (hard floors) | High | High | Poor |
| Office or kitchen | Very High | Very High | Poor |
If you’re recording in a living room or kitchen, don’t panic. Use the room treatment tips from earlier in this article and apply noise reduction in post. You can still get a clean result — it just takes more effort.
FAQs About Fixing Bad Podcast Audio
Q: Can I completely fix bad podcast audio in post-production?
A: You can improve it significantly, but you can’t always fix it completely. Heavy reverb, extreme clipping, and very loud background noise are hard to fully remove. Prevention is always better than trying to fix things after the fact.
Q: What’s the easiest free tool to fix bad podcast audio?
A: Audacity is the most widely used free option. It handles the most common issues — noise reduction, EQ, compression, and normalization — and there are tons of tutorials online. For something even simpler, Adobe Podcast Enhance (free online tool) uses AI to clean audio automatically.
Q: How do I fix echo in my podcast recording?
A: The best fix for echo is recording in a treated room. If you already have a recording with echo, use a de-reverb tool like iZotope RX De-Reverb. For mild echo, try EQ cuts in the mid-range (around 500 Hz to 1 kHz) and apply compression to tighten the sound.
Q: My guest’s audio is terrible. What can I do?
A: Try AI noise removal tools like Descript’s Studio Sound or Adobe Podcast Enhance on their track separately. If there’s a lot of background noise, iZotope RX gives you the most control. Also, consider re-recording the interview using a better remote recording platform like Riverside.fm.
Q: What LUFS level should a podcast be?
A: The standard is -16 LUFS integrated for Apple Podcasts and Spotify. YouTube normalizes at -14 LUFS. Most podcast editing software and tools like Auphonic can automatically target these levels.
Q: Is a USB or XLR microphone better for podcasting?
A: Both work well. USB microphones are simpler and plug directly into your computer — great for beginners. XLR microphones require an audio interface but offer more control, better quality, and more flexibility as your show grows.
Q: Does room treatment really make that big a difference?
A: Absolutely. Even simple changes like recording in a closet full of clothes or hanging a blanket behind you can dramatically reduce echo and background noise. It’s one of the highest-impact, lowest-cost improvements you can make.
Conclusion: You Can Fix Bad Podcast Audio — Here’s Where to Start
Bad podcast audio doesn’t have to be permanent. With the right setup, the right tools, and a clear editing process, you can turn rough recordings into clean, professional-sounding episodes.
Start simple. Fix your recording environment first. Then focus on getting your gain levels right. After that, work through the editing steps — noise reduction, EQ, compression, and loudness normalization. Each step builds on the last.
Fixing bad podcast audio is a skill that gets easier every time you do it. Within a few episodes of applying these techniques, your show will sound noticeably better. And when your audio sounds good, listeners stay longer, subscribe more often, and come back for every new episode.
Your story deserves to be heard clearly. Now go make it sound great.